|
|
Post by Neon Rosell II on Jan 3, 2010 7:00:06 GMT
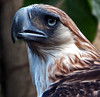
Here’s a technique to handle black and white subject, merge two exposures together. 1. expose for the whites 2. expose for the blacks 3. merge the two photos as below I’ll teach you guys how to do it if you stop posting your photos from here on till I get back..hehehe Tail, bill, casque, part of the face and tree have a lot of blow areas on the original photo. Unposted photo of Palawan Hornbill taken Dec. 19, 2008, Puerto Princesa, Palawan 40D + 600mm L IS, f6.3, 1/125 sec, ISO 400, manual exposure, Tripod-Gimbal support.  Here's the original unprocessed cropped and re-sized photo 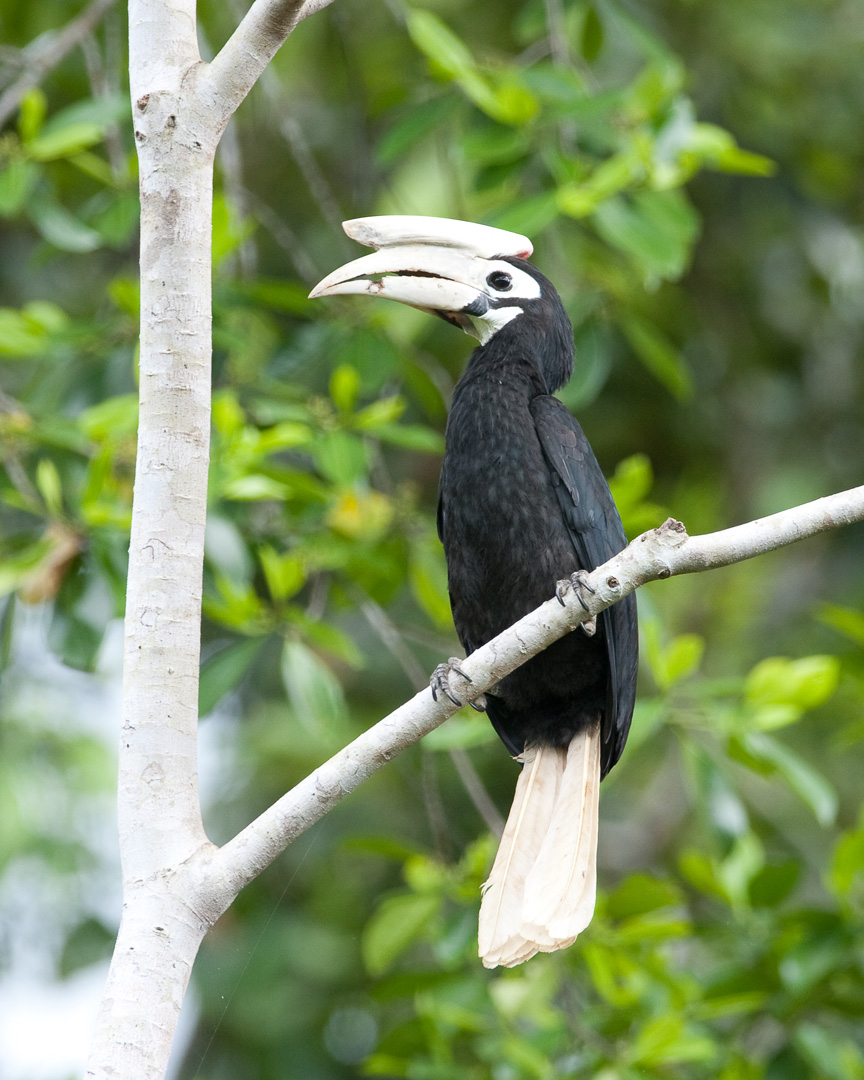 |
|
|
|
Post by Dennis Alfaro on Jan 3, 2010 7:47:45 GMT
Looks like it is a great technique Neon. it really improved . is this technique similar to an HDR where in you merge different exposures? but am interested in learning your technique  |
|
|
|
Post by Neon Rosell II on Jan 3, 2010 7:57:38 GMT
Looks like it is a great technique Neon. it really improved . is this technique similar to an HDR where in you merge different exposures? but am interested in learning your technique No, not HDR ;D. I tried HDR but the colors become unnatural. Much simpler than that. |
|
|
|
Post by alainpascua on Jan 3, 2010 10:32:28 GMT
Whew, so that's it, Neon! How do we do it? Can you please teach us and show the step by step procedure? Can you improve further the picture of Balicassiao using this technique? The original file can be downloaded at alainpascua.smugmug.com/Birds-by-Location/Birds-in-Negros-Oriental/8906743_x7EkV#754428034_iaqMv-O-LBI guest your original picture is what Rey always says as shooting a bit to the right, somehow quite overexpose so the details can come out in the processing, better than underexposed. Did I get that right? |
|
|
|
Post by Neon Rosell II on Jan 3, 2010 13:20:40 GMT
Whew, so that's it, Neon! How do we do it? Can you please teach us and show the step by step procedure? Can you improve further the picture of Balicassiao using this technique? The original file can be downloaded at alainpascua.smugmug.com/Birds-by-Location/Birds-in-Negros-Oriental/8906743_x7EkV#754428034_iaqMv-O-LBI guest your original picture is what Rey always says as shooting a bit to the right, somehow quite overexpose so the details can come out in the processing, better than underexposed. Did I get that right? Hi Alain, Your photo has sound technicals already and great as is, I guess all other manipulation is relative to the one who's doing it. Anyway, here's my interpretation using the same technique as above. By using different brush softness and opacity I was able to get rid of the blown white and increase the contrast a bit. Hope you like it.  I would still say getting the exposure spot on would save you a lot of misery later on. ;D |
|
|
|
Post by alainpascua on Jan 3, 2010 14:55:40 GMT
Wow, this is superb, Neon! It's definitely better than the one I processed. I love the ridding out of the blown white area and the increase in contrast! Hope you can teach me this technique. Thanks!
|
|
|
|
Post by Ronnie Dominguez on Jan 5, 2010 14:32:20 GMT
Hi,
There might be a Photoshop plugin or script for fixing blow areas. I have one but for GIMP not PS. Sorry i dont know how to use PS. How about trying the magic wand and use curve and levels and others on the fuzzy select areas of the wand? Will this work on PS?
|
|
|
|
Post by Ding Carpio on Jan 7, 2010 22:11:15 GMT
Okay, okay. Enough suspense, already, Neon! Teach us the workflow.
I promise not to post anymore La Mesa birds til you come back.
|
|
|
|
Post by Edu Lorenzo Jr on Jan 8, 2010 0:57:08 GMT
I promise not to post any bird images until Neon arrives I promise not to post any bird images until Neon arrives I promise not to post any bird images until Neon arrives I promise not to post any bird images until Neon arrives I promise not to post any bird images until Neon arrives Why oh why did my elementary school chalkboard didn't support copy and paste!  |
|
|
|
Post by Edu Lorenzo Jr on Jan 8, 2010 1:02:04 GMT
Okay, expose for the lights and expose for the darks.. check. The merge part is where I am lost. |
|
|
|
Post by Dennis Alfaro on Jan 19, 2010 1:11:59 GMT
Neon is here but forgot to ask him last sunday at Candaba ;D
|
|
|
|
Post by Eric Patdu on Jan 27, 2010 1:00:09 GMT
Would like to learn the magic too. |
|
|
|
Post by Neon Rosell II on Mar 7, 2010 4:02:59 GMT
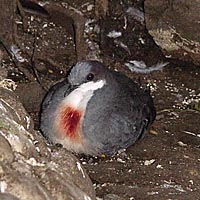
Here's another instance where you can apply this technique - under exposed shots. When I first saw, on my camera screen, that I captured a Chestnut-cheeked Babbler in the open and it was under exposed with an OOF head, 5DM2 + 600 mm L f4 IS + 2x Kenko TC, f8, 1/320 sec, ISO 640, manual exposure in available light, Tripod-Gimbal support.  I knew this was a special shot, this was the only shot (out of several Gb) I got of this species out in the open, when, for a split second it perched on an open branch and I was able to squeeze the shutter, I realized I need to do something to get it more presentable. After applying the same work flow as above and doing a double pass of USM on the head after which a good application of contrast, I got this end product. 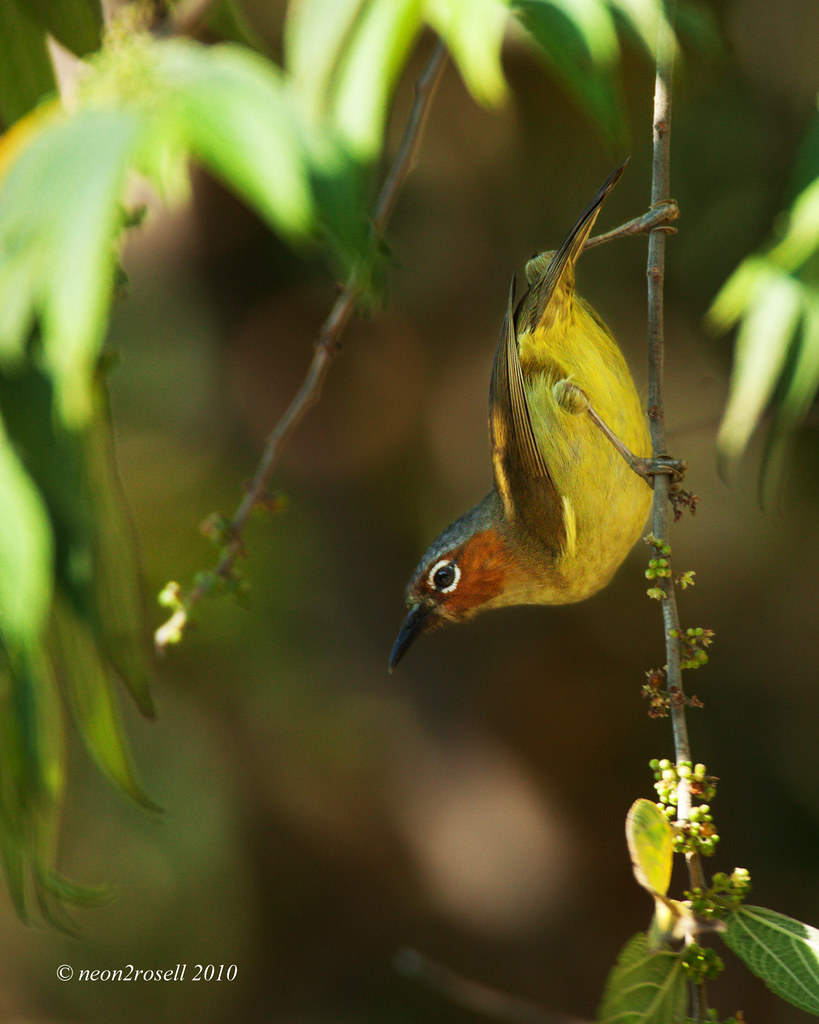 C&C would be highly appreciated..  |
|