|
|
Post by Neon Rosell II on Jan 25, 2008 16:58:19 GMT
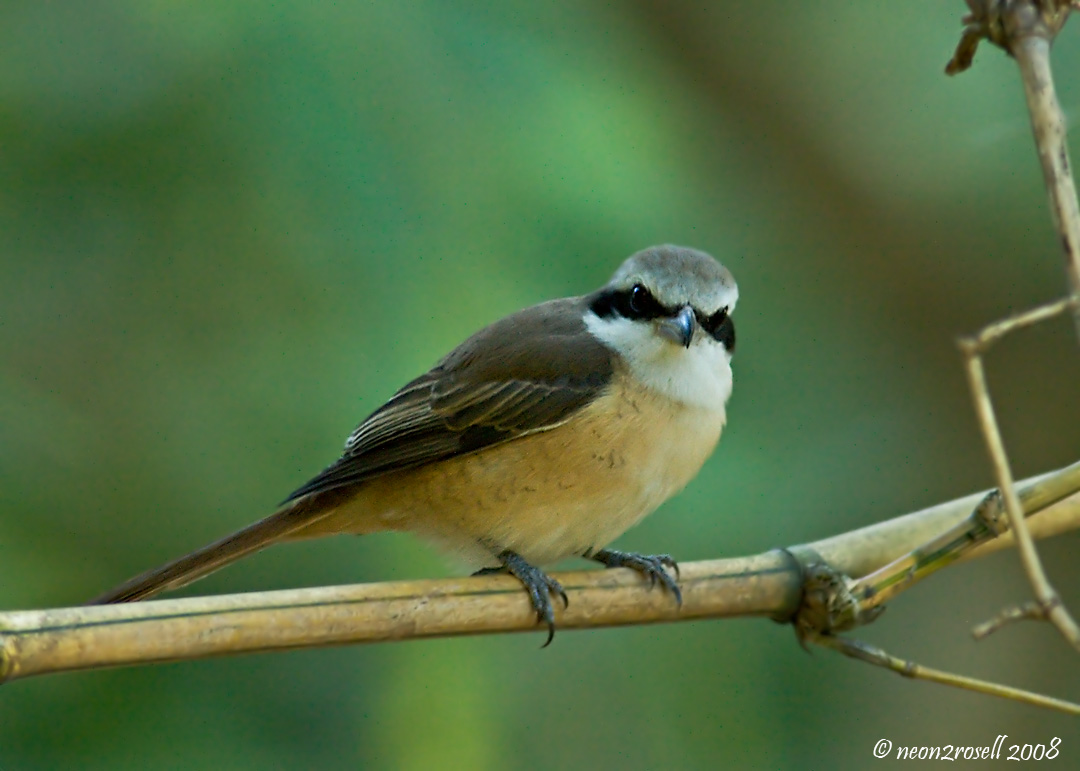
I was basically trapped in UP due to the car color coding scheme. I got nothing more to do so I started playing around with high ISO settings and see what amount of noise the 40D would generate and how would the photos look like after PP with noise reduction. Here are field tests photos. Click on the photos for the larger version.ISO 160040D + 300 f4 L IS + Kenko 2x TCs, 600 mm, f/8, 1/30 sec, ISO 1600, Hand Held  ISO 3200 ISO 320040D + 300 f4 L IS + Kenko 2x TCs, 600 mm, f/8, 1/15 sec, ISO 3200, Hand Held 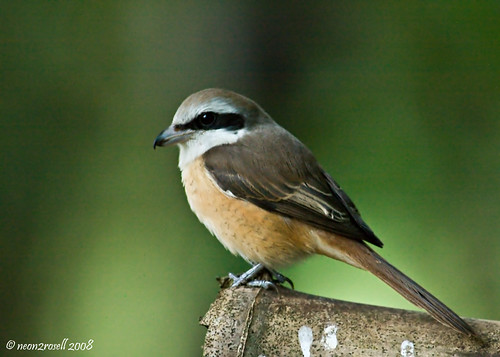 I guess using high ISO is not that bad when hand holding in low light. Cheers, Neon |
|
|
|
Post by Bobby Kintanar on Jan 26, 2008 1:15:19 GMT
Wow, amazing shots at that ISO! What NR did you use? :-)
|
|
|
|
Post by Romy Ocon on Jan 26, 2008 1:19:12 GMT
Excellent examples of high ISO use, Neon! The important thing in using high ISOs is to shoot to the right - pushing the histogram so it will be as close to the right wall as possible without hitting it. This will give the sensor pixels more light to amplify and higher signal-to-noise ratios. Any slight underexposure and subsequent pushing in RAW conversion/PS will worsen the noise. Also, noise is more prevalent in OOF areas, so the choice of BG is also very critical - it should be as bright or slightly brighter than the subject. Here's a favorite high ISO capture of mine, which was shot to the right - 40D + 100 2.8 macro, ISO 1250, 1/160 sec, f/8, manual exposure, hand held, processed and resized:  Romy |
|
|
|
Post by Bobby Kintanar on Jan 26, 2008 2:11:12 GMT
That fly macro is amazing master! I can't even see any noise worth mentioning. Did you use PS's NR on this shot or was it PP'd the "normal" way lang? I seem to have noisy pix from my 40D at ISO's above 400. :-)
|
|
|
|
Post by Romy Ocon on Jan 26, 2008 2:23:44 GMT
Hi Bobby, This was processed the normal way, but I used Zoombrowser to convert the RAW. This yields less noise at the expense of less detail. Note that the BG is much brighter than the subject, and that mitigated the noise in the OOF areas. Romy That fly macro is amazing master! I can't even see any noise worth mentioning. Did you use PS's NR on this shot or was it PP'd the "normal" way lang? I seem to have noisy pix from my 40D at ISO's above 400. :-) |
|
|
|
Post by Neon Rosell II on Jan 26, 2008 6:31:51 GMT
Wow, amazing shots at that ISO! What NR did you use? :-) Hi Bobby, Thanks! ;DI used Neatimage program to eliminate the noise. Cheers, Neon |
|
|
|
Post by Neon Rosell II on Jan 26, 2008 6:35:24 GMT
Excellent examples of high ISO use, Neon! The important thing in using high ISOs is to shoot to the right - pushing the histogram so it will be as close to the right wall as possible without hitting it. This will give the sensor pixels more light to amplify and higher signal-to-noise ratios. Any slight underexposure and subsequent pushing in RAW conversion/PS will worsen the noise. Also, noise is more prevalent in OOF areas, so the choice of BG is also very critical - it should be as bright or slightly brighter than the subject. Here's a favorite high ISO capture of mine, which was shot to the right - 40D + 100 2.8 macro, ISO 1250, 1/160 sec, f/8, manual exposure, hand held, processed and resized: Romy Wow!! Cant even see a single pixel noise!! Thanks for the tips again I'm now not afraid of using higher ISO on hand held shots!! Cheers, Neon |
|
|
|
Post by Martin Alvendia on Jan 26, 2008 16:22:58 GMT
Excellent examples of high ISO use, Neon! The important thing in using high ISOs is to shoot to the right - pushing the histogram so it will be as close to the right wall as possible without hitting it. This will give the sensor pixels more light to amplify and higher signal-to-noise ratios. Any slight underexposure and subsequent pushing in RAW conversion/PS will worsen the noise. Also, noise is more prevalent in OOF areas, so the choice of BG is also very critical - it should be as bright or slightly brighter than the subject. Here's a favorite high ISO capture of mine, which was shot to the right - 40D + 100 2.8 macro, ISO 1250, 1/160 sec, f/8, manual exposure, hand held, processed and resized: Romy Sir Romy, when you say "shoot to the right," do you mean overexposing the shot? Canon and Nikon's metering are different....just want to make sure I understood you right....Thanks! |
|
|
|
Post by Neon Rosell II on Jan 26, 2008 21:11:22 GMT
Excellent examples of high ISO use, Neon! The important thing in using high ISOs is to shoot to the right - pushing the histogram so it will be as close to the right wall as possible without hitting it. This will give the sensor pixels more light to amplify and higher signal-to-noise ratios. Any slight underexposure and subsequent pushing in RAW conversion/PS will worsen the noise. Also, noise is more prevalent in OOF areas, so the choice of BG is also very critical - it should be as bright or slightly brighter than the subject. Here's a favorite high ISO capture of mine, which was shot to the right - 40D + 100 2.8 macro, ISO 1250, 1/160 sec, f/8, manual exposure, hand held, processed and resized: Romy Sir Romy, when you say "shoot to the right," do you mean overexposing the shot? Canon and Nikon's metering are different....just want to make sure I understood you right....Thanks! Hi Martin, From what I understood, "shooting to the right" means using your camera's histogram to get the right exposure wherein most of the peaks are bunched up to the right (more on the bright side). It is not overexposed since, as Master Romy said "so it will be as close to the right wall as possible without hitting it." Cheers, Neon |
|
|
|
Post by Romy Ocon on Jan 27, 2008 1:38:08 GMT
Yes, Martin.... as Neon said. When you expose to the right without hitting the right wall of the histogram, it normally results into a photo which is brighter than the scene in real life. You can pull back later during RAW conversion, and this will mitigate noise. Shooting to the right essentially makes efficient use of your sensor's DR, regardless of DSLR brand and metering approach. The key is histogram review. Likewise, a bright portion of the photo "stimulates the pixel" more (gives a stronger signal) compared to darker areas. Noise is basically constant in magnitude throughout the frame at each ISO value. Hence, the signal-to-noise ratio (SNR) of bright areas is higher than in dark areas of the same photo. This is the reason why you see little noise in bright areas when using high ISO, while the dark areas are very noisy and sometimes with banding.  |
|
|
|
Post by Martin Alvendia on Jan 27, 2008 3:40:35 GMT
Thanks Neon and Romy! Will give it a try one of these days.
|
|